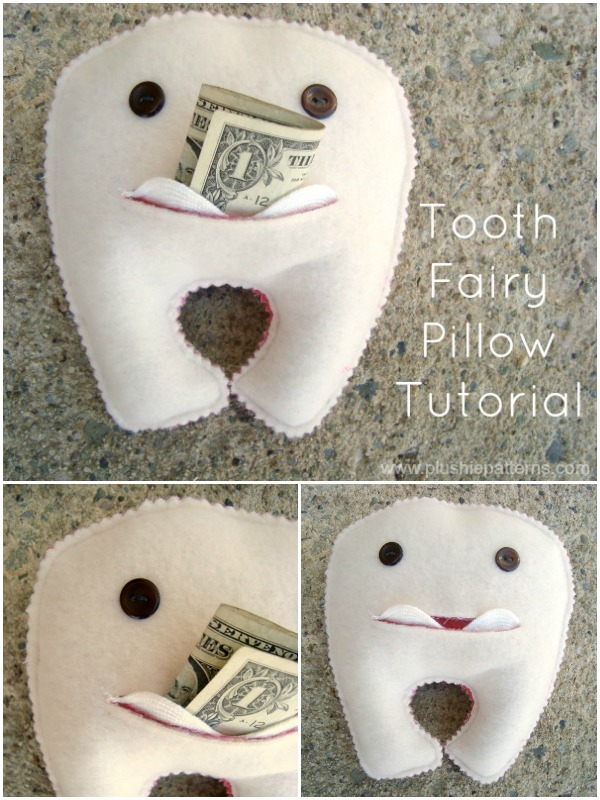
Kids lose teeth. There is simply no way around it! Sometimes you can keep up with how many teeth the lose!
This little tooth fairy pillow is simple and quick and is the perfect thing for sending the tooth on to the fairy and getting a little goodie in return.
Supplies for Sewing:
Tooth Fairy Templates– Download Get the password for the library including this pattern!
white fleece {or your own color}- tooth body
cotton fabric- 12″ X 12″ lining
extra large ric rac- white teeth
2 buttons- eyes
polyfil stuffing
pinking shears
Tooth Fairy Pillow Tutorial
1) Pin templates on fabric and cut out- 2 fleece and 2 cotton
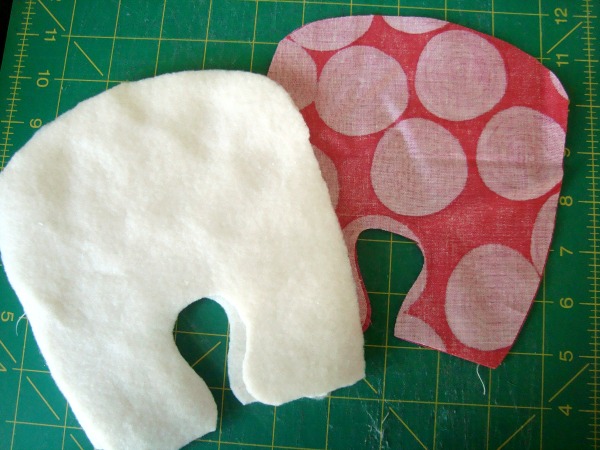
2) Fold template down and draw line on the wrong side of one cotton piece

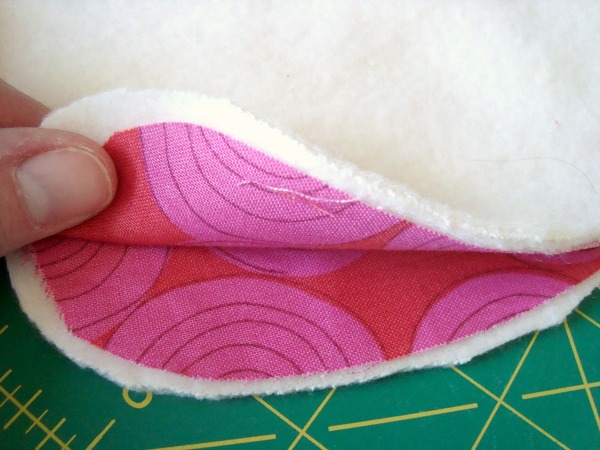
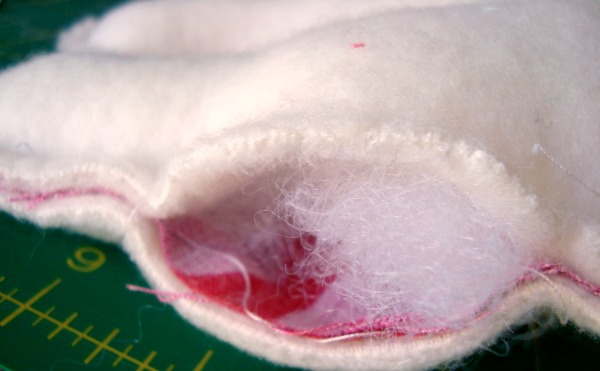
3) Cut on drawn line. Lay wrong sides together one fleece and the cottong body with the mouth slit. Slip the ric rac in between the layers and out the mouth slit. Stitch around the mouth. Move teeth when sewing the top of the mouth, you want to beable to open it for the pocket.
* you can play with the placement of the ric rac. You can show a couple of teeth, only one, or leave it totally out for no teeth. The cut edges will be hidden in between the layers.
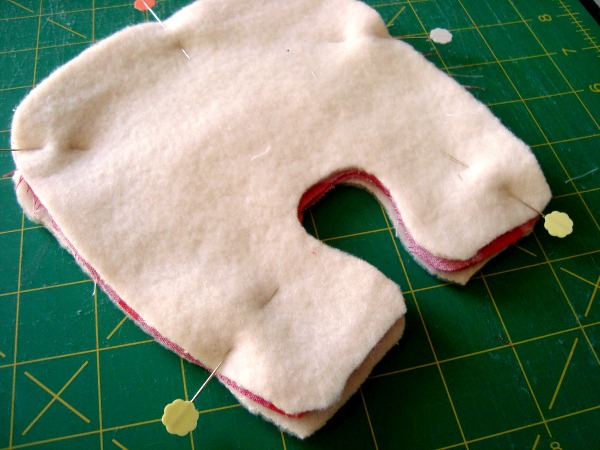
4) Layer all 4 pieces together- right sides of the lining cotton will be facing each other. Right sides of the outside fleece with be facing out.
5) Pin layers and sew all the way around the tooth, leaving a 2 1/2″ opening on one side for stuffing
6) Stuff softly the tooth. Stuffing will go in between one outside fleece and the lining
7) Continue sewing to close the opening
8) Cut the sides with pinking shears
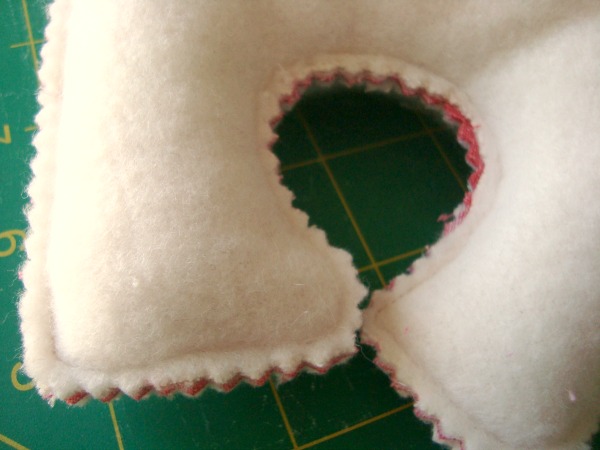
When the tooth fairy arrives, the money can easily be stuffed into the mouth.

8 Responses
Tooth Fairy Pillow Tutorial | Crafty Brewster
[…] Source: www.plushiepatterns.com […]
Lara @ Methodical Living
This is so cute to leave the tooth fairy’s gifts in. I’ve pinned this for future use! Thank you for sharing.
-Lara
Laura@Baking in Pyjamas
What a cute idea. Thanks for linking up to Sweet and Savoury Sunday, stop by and link up again. Have a great day!!
Jill
This is seriously too stinking cute! Pinning this!
Thank you for stopping by the Thoughtful Spot Weekly Blog Hop this week. We hope to see you drop by our neck of the woods next week!
Thoughtful Spot Weekly Blog Hop | ABC Creative Learning
[…] Carrie Elle Spiced Apple Cupcakes with Caramel Cream Cheese Frosting By: A Simple Pantry Tooth Fairy Pillow Tutorial By: Plushie Patterns Age Appropriate Chores for Young Children By: Your Modern Family […]
Kye
This is a cute idea! Out of curiosity–why did you opt to trim the seam with pinking shears instead of turning the project right-side-out?
Becky
Just because it’s easy and quick. Very forgiving as well.
Becky
Just a lot quicker to stitch and be done. 🙂